Showing posts with label my sustainable yard. Show all posts

Sunday, June 10, 2012

gardens done-ish!

As you may recall, this is the Before of the "Corner Garden"

And this is the After!!

Imagine it with these flowers (cuz the roots have been planted in there!): Cote d'Azur Pinks


Also, the blackberries are starting to turn!


Whatcha got growin'?

Much Love,
Able-Bodied Girl


Wednesday, May 30, 2012

outside my comfort zone

First things first. Thank you to all my readers, friends and random folk alike. Able-Bodied Boy (aka Manuel) has passed along all your encouragement and love, and I was shocked to hear so many random acquaintances and friends of friends of friends have been following along. Glad to see the blog has reached outside it's own "comfort zone"... certainly not a bad thing :) Thank you. Your kind words mean so much, and hearing how it's inspired you to try new things and act a little more sustainably makes me that much more eager to share my own journey.

And that leads to a couple of weekends ago. You know, that very weekend when you may have been talking about me around a fire with Able-Bodied Boy? Well, I was way outside my comfort zone.

I was getting sweaty out in the heat, growing things.

I may have mentioned my loathing of all things hot and humid.  And my lack of a green thumb. So yeah, combine those two and it made for an interesting weekend.

April is a great month for pruning and mulching and planting. Which is why I did it in mid-May. Yeah, procrastination abounds in my world. But at least I bought a mess of bulbs and tubers, planned a new garden or two, ordered a ton of mulch, and promptly watch Able-Bodied Boy drive away leaving me to do it all. HA! That's what I get... :)

So, in true Able-Bodied fashion, I forgot some of the BEFORE pictures. So you'll just have to imagine a jungle with trees. Literally. A jungle. With TREES. For any garden lacking a before shot.


AFTER: The Front Bushes. These two bushes were man-high and making the front walk nearly impassable. The bushes lost 60% of their weight, and all the weeds and trees in the rest of the bed were replaced by mulch.

The goodies from Van Bourgondien. I love they include a Garden Guide that tells you how/when to plant and care for all of the plants they sell.


BEFORE: The Mini Garden. Now housing weeds and the panels from an old fire pit.

MIDPOINT: The Mini Garden. Weeded! Pretty soon we will build a raised bed for some Cote d'Azur Pinks.

BEFORE: The Back Garden. All weeds and vines and wretchedness.

MID-POINT: The Back Garden. I tilled the clay-bound soil for an hour. Yay no more weeds!

AFTER: The Back Garden. I planted Windflowers and mulched the bed. Later, gas lines were being installed and they dug up half the bed :(

Random hanging basket and my spider plants recovering from a winter of abuse.


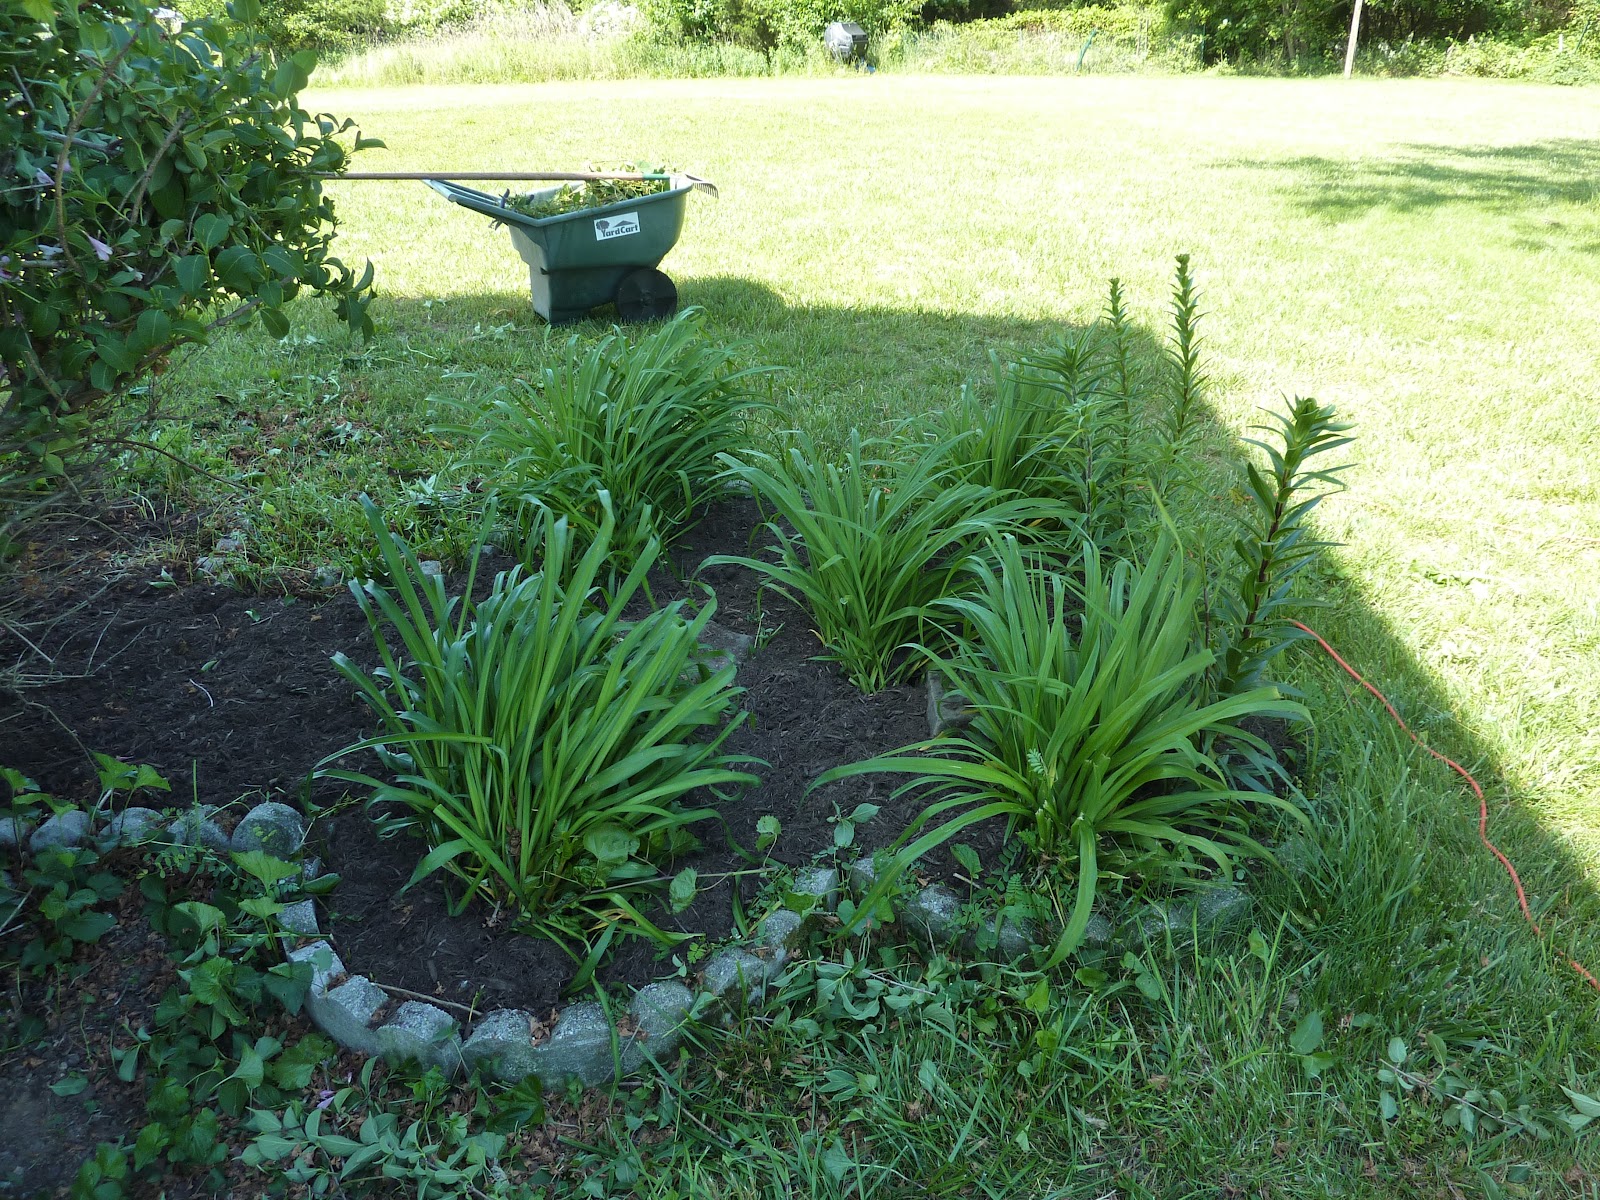
AFTER: The Lily Garden. Weeded and mulched!


AFTER: The Bulb Garden. Weeded, mulched and Periwinkle roots planted

And the best for last.... the blackberries are berrying!!! We should have a FABULOUS crop of them starting in July.

Some of the thousands of blackberries :)
What do you have growing?

Much Love,
Able-Bodied Girl


Wednesday, May 25, 2011

mid-week weigh in/check in

Well, I hopped on the scale this morning and I'm 9lbs down from where I started. So way to go me!

I've reduced my daily intake (to compensate for my woeful lack of cycling - due to rain and very occasional laziness and frequent time constraints) and have been watching my snacking. If I overeat, I fill my belly with ice cold water later when it claims to be hungry.

In short, I've been good about eating :)

What I have not been good about it posting. I have a lot of excuses for you... but you deserve better than that. I'm trying not to judge myself against other bloggers that give you something to chomp on nearly daily. But I've gotten such wonderful positive feedback from so many people that I feel encouraged to write again. "Again", meaning all those years I didn't write, or if I did it was whiney or personal or ranting and I didn't think about my audience, my purpose. You know, all those things an English major is trained to consider....

I have to remind myself that winter was a time of darkness, inner reflection, huddled against the warmth of hearth and home. Boring, basically. There's time to write. Time to plan. Time to share.

Spring? Not so much.

Summer? I hate the heat and Able-Bodied Boy has tons of travel. So I'll be home with dear sweet (when she's not attacking our friends... oh rescue woes) Bella , tending crops, processing foods, and writing more about all that. Plus chickens. Don't forget the chickens!

In the meantime, I'm eyeballing my Clean Hippie page for a new project (and feel free to comment there with list suggestions!)...

What do you want me to try next? Homemade deodorant? Replacing paper towels with cloth? Labeling current chemical cleaners with their future replacement (mixes of baking soda, vinegar, etc)? Or re-designing this damn blogger page :)?

Much Love,
Able-Bodied Girl


Monday, April 25, 2011

nesting, in photos

I hear pregnant moms "nest", getting their homes ready for the baby.

Expectant chicken-owners do too, I think...

the BIG box
lots of pieces, but easy to figure out

a broken part, but they quickly shipped a replacement!
looking down inside the coop

the nearly-finished coop!


still waiting on the roof piece

all so we can enjoy that big orange yolk on the left, not the runny yellow one on the right

It'll totally be worth being called a dirty hippy. Go Chickens!

What's the big project in your life right now?

Much Love,
Able-Bodied Girl


Tuesday, April 12, 2011

chicken commitments

Well, it's official. Able-Bodied Boy bought a chicken coop. We're getting chickens!

I'm not altogether upset that we went the easy route and purchased a pre-made one online. Sure, I would have loved to have had the time and know-how and ability to build our own, reusing wood and making it eco-friendly/sustainable. But really, that wasn't feasible and would have pushed this off for many many months.

In the end, I think that getting closer to our food sources is a much bigger step than building it ourselves. As food corporations get larger and more influential, I fear that comsumers - not the corporations or governments - will have to become more accountable for the food choices they make. Which is why having chickens, joining a CSA, preserving our harvested goods for later consumption, buying local meat & dairy products, learning how to garden, and generally have a self-sustaining lifestyle are all really important to me.

Yes, we're going to defy the local ordinances that dictate we can't have chickens. First, we believe the ordinances to be a residential protection for the smell and sound (roosters). Our planned coop location is 100 yards from our neighbors across the street, and not within line-of-sight of their homes (brush and trees block the view). We don't plan to have any roosters. Our other reason for not requesting a variance is the cost... it's a $300 gamble as to whether or not they'll approve us. And since we don't believe there would be any fee (just the lost investment) if we were to be asked to remove the coop and chickens, it's an added cost we want to avoid.

Once we get the coop, assemble it, and place it, we will dig a 6-inch wide trench of sod out from around the coop. We'll get some additional chicken wire, tie it to the coop fencing, drop it down to the soil and then bent 90-degrees out along that 6-inch trench, then replace the sod. With that, any animals trying to dig under the fence will immediately hit chicken wire and be halted. There is some concern about the latches being too easy for raccoons, but we have never had a raccoon problem in our area so we're crossing our fingers about that.

We've opted to not raise chicks and go for the purchase of pullets (teenagers), three birds to be exact. I think Able-Bodied Boy told me that the next shipping date is in May, so I guess we'd better be ready by then! I'll keep you posted :)

So, who wants to barter for eggs?

Much Love,
Able-Bodied Girl


 ps. next up.... a dog? 

Monday, February 28, 2011

backyard chickens!?!?

You have no idea how surprised I was when Able-Bodied Boy mentioned a year or so ago that he might like to have some egg-layers. Sweeeeeet! My friend Barnhenge Momma has a few dozen egg-layers and meat birds, and she makes it look so easy. Which, it seems, it is pretty easy:

a Rhode Island Red
Buy/build coop and run. Raise chicks or buy pullets (teen-aged birds). Put them in the coop. Give them a hand with where to lay eggs (if it's the first set of birds you own, they need a bit of training since they don't have other birds to watch). Collect eggs and check water and feed daily. Clean the coop and run every 1- 2- 3- 4- weeks, depending who you talk to and the conditions. Overall, not really all that difficult!

We learned most of what we know from the PASA Backyard Chicken class we took on Saturday, led by the very knowledgeable and sweet Amy and Chris. They definitely made it seem very attainable for a lot of different folks. We also plan to spend a day with Barnhenge Mama (and Papa) to do a "chicken internship" :)

We have quite a list of things to consider before we make the plunge, though.

  • Do local ordinances allow us to have them? Is the coop a large enough structure that it needs to follow some sort of code? (Zoning officer will be dropping off information this week!)
  • Where do we put the coop and run? Will it get a mix of sun and shade, or do we need to provide some sort of shade cover (vines over the top)? Will a little smell bother you if it's close to the house, or can you combat that with fragrant flowers/herbs?
  • How do we procure the coop? DIY, help from an experienced coop-builder, buy it online...?
  • Do we get a rooster? They can help with protection when the birds are outside of their run. Are we letting them out of the run much? Will our neighbors care about the crowing?
  • Do we get chicks or pullets? Chicks take a bit of care for 3 months to raise, but the handling will get them used to you (and kids, if you have them). Is it much more expensive to get pullets?
  • Where will we get our hay/cedar chips from?
  • Do we have a reliable chicken-sitter when we are both away?
Needless today, Able-Bodied Boy and I don't really see eye-to-eye on a lot of this. Tons of discussions to come. But I'm sure we'll come up with a good plan that works for both of us!

Once we have 3-4 birds laying, we'll start getting around a dozen eggs each week. Which is quite a bit for us, but I think we can use them to barter with others for garden produce or other homemade goods. We'll also have a good bit of fertilizer to use in the garden, to supplement the worm compost. And they will eat most excess foods we don't give the worms, so we can stop putting scraps in the trash or bushline (even at Thanksgiving!).

Amusingly, mentioning all this on Facebook prompted a lot of my friends to speak up about their experiences with chicken-raising. Have you had chickens? What's the best/worst thing about it?

Much Love,
Able-Bodied Girl


EDIT: We got the copy of the relevant local code; looks like this might be a problem. For any agricultural/farming uses, we need to have 5+ acres and set the structure 200ft from the property line. With only 1.5 acres, that puts the coop under our house and still 3.5 acres short. Our property is bordered by the road on one side and by one owner's horse pasture or unused land. So there would really be no residential issue, if that's the concern.
We're going to look into the feasibility of getting a variance (will ask if it's ever been done before). If we might be able to get one, we'll try to get the neighbor's support and take our tiny coop plans to see about a variance. If it doesn't look like a variance is going to happen, we may just talk to the neighbor and/or take our chances... I'll keep you posted!


Tuesday, February 22, 2011

w/mo2h #4: composting with worms, part three


part three: better living with worms

So, we've gotten a worm composter. We've already dealt with some issues. What now?

Bedding. Worms are not princesses; this doesn't have to be a too hard, too soft, gotta get it just right sort of thing. When you start a new tray, they just need something that has good circulation of air and won't break down too quickly. The list of options can get pretty extensive, but shredded paper product, dry shredded leaves, peat moss, and yard clippings all work. Most people recommend a "mixed bed" using a couple of different materials, and adding water to get it to the right moisture level. Some recommend making sure they have something gritty in there (sand, soil) to help the worms digest everything, but I've also read that food scraps have enough gritty bits for the worms.

Pasty Peat! (sounds like a bad pirate name...)
I use a half bucket of peat moss mixed with a couple handfuls of lime (Journey to Forever-recommended, but other sites have said that lime is not necessary. Maybe I'll try it without one time to see how it goes.). Then I start adding water and stir it up with a 3-prong cultivator or fork until it gets more on the pasty side and less on the crumbly side. It's not an exact science unless you really want it to be! After that I mix a couple large handfuls of shredded paper and spread that out in the new top tray. Remember that these trays have holes in the bottom; a pizza box lid works perfectly to help transport trays with the least amount dropping.

One new tray, ready to go!
Food (Concerns). They can eat pretty much any organic material (we're talking the general natural-not-man-made sort of "organic", not the over-priced inconsistently-regulated sort.) like paper products, fruits, grains, vegetables, garden trimmings (disease-free, please!). 

I have read various advice about what not to feed your worms. Citrus, onion, garlic, meat, dairy, fats/oils, fish, bones, etc. Again, Journey to Forever's advice was the best: go for it, but try them each in small quantities first. If you aren't sure, look up the type of food to find out if there are any concerns. Citrus may be too strong for worms, so you'll find that it's use is recommended sparingly; too many grains may cause overheating of the compost; meat/dairy/oils may cause bad smells. Paper and veg products are generally safe, so start there and add other stuff in small amounts. You might get smell, the worms might not be able to decompose it, but in smaller quantities you'll have a much better change of thwarting another Thanksgiving Day massacre-type event.
Our happy worm home :)

Feeding and Layers. So, we keep a "Happy Worm Food" jar in the kitchen. We put in diced food scraps and take it down to them every few days. Right now I would like to get at least one tray through the process, without incident and without putting in any "iffy" food stuffs. I put each bunch of scraps in a new pile under the bedding (using a fork, trowel, or cultivator!) in a grid system - think Tic-Tac-Toe board. Your "working" tray - the topmost tray that is receiving food scraps - should have the bedding on top and the food underneath.

Harvesting and Rotating Beds. Once all your food pile spots are full, it's ready to sit to allow the worms to process the scraps, and you're ready to start a new bed for new scraps. The worms can travel among the beds by using the holes in the bottom of each tray. So make a fresh "working" tray and put it on top of the older tray. The worms will migrate up as they are ready, and you can start putting food scraps in to attract them. The trick is that the bottom-most tray should always have sheets of paper in the bottom to prevent them from going through the holes into the drip tray; so the very first tray you make will have paper in the bottom.
It's compost!

Once the bottom tray looks dark and rich and you can't really see much left of your scraps, then it's compost! We keep a large bucket to put the finished compost in; haven't yet decided when we'll use it but it's certainly going to go in the garden. I use a gloved hand to pull out some of the worms that are still in there, but you don't have to as long as most of your worms have already migrated up to the other newer trays.

Once you take out that bottom tray, you should make sure that the new bottom tray has the paper in the bottom of the tray so the worms don't drop. This has been a bit tricky for me to figure out. If upper trays have had no bottom lining so the worms can migrate up, but the food scraps have to stay underneath of the bedding, how can I put paper under all of this or transfer it all into a papered tray? My solution: dump the material for the bottom-most processing tray into a new paper-lined tray, and then cover with a light layer of the new bedding for the new working tray. 

Worm life and reproduction. Without getting into too much detail, they will reproduce themselves to sustain life in your composter. If you give them plenty of food and bedding, they'll keep reproducing; if you stop feeding them as much, they won't reproduce as much. Or something like that. Suffice to say it's population control and it's based on what you give them. I told you I didn't want to go into detail! I'm sure my worms have been cranking out the babies because I still have good population in there these 4-5 months after purchase; I just haven't sought out their little hatchling capsules.
Worm Tea: not for drinking!

Worm Tea. Excess water drips through the trays into the trip tray, and can be disposed of using the spigot. But don't toss this down the drain!  Save it as an excellent plant fertilizer! Liquid gold, I tell ya!

Other Considerations. There are other things you need to watch out for; generally, checking in once a week is a good idea. Environmental temperature of 60-80F - colder or hotter and you'll have to do some extra work. Compost temperature - if it's getting quite hot, it's the result of environmental temp or types of food and there are solutions. Moisture - too damp, add dry shredded paper; too dry, add water or wet food. Bugs and Smells - types of food and moisture levels.

Perks. Year-round compost production. Indoor or outdoor operation. Only requires work every 4-6 weeks. No pet sitter - can be left as is for several weeks at a time. 


So, would you consider composting with worms?


Much Love,
Able-Bodied Girl


Monday, February 21, 2011

w/mo2h #4: composting with worms, part two

part two: the great worm suicide, the thanksgiving day massacre, and other issues

When we last left off, our fearless worm-lover had started her composting adventure, not yet realizing the worm trajedies about to befall her...

I don't remember where I read it, but I had heard that the worms get really confused when they are first put into the composter. They decide to find the darkest spot and - even though the bed you just put them in is nice and dark and food-rich - they opt to crawl out.

Thus, the great worm suicide. I put them under a window. I put a small light directly shining on the lid. And yet a dozen or so (which is actually very little of the pound) crawled out to their death on the floor of the basement. Do not fear though! Had I taken the time to get a high-powered workshop light over there, I probably would not have any problem with suicidal worms. But it is apparently a common issue. If you are not fond of seeing worms, but are willing to try vermicomposting, I suggest laying some newspaper extending a few feet from all sides; if you do have any suicides, it'll be easy to roll them up.

The first couple of months went very well. We cut up our food scraps into bite-sized pieces (human bites, not worm bites :-P) and buried them under the bedding as directed. We created a good bit of food for them, but they seemed to be eating it. By the time I had buried little piles all through the first tray, the first pile in that tray was decidedly less distinguishable than the newer scraps.

As Thanksgiving approached, I figured we would need another tray to accommodate all the scraps as we hosted 6 adults for the holiday weekend. So I made it a couple of weeks in advance so the worms could start migrating up to the new tray and get acclimated. (More on how to make your bedding in part three!) That weekend, we added scraps and more scraps and even more scraps. The top tray filled pretty quickly, and we stopped giving them any more. Out came the old kitchen bucket and we started hauling out to the brush again.

I didn't think much of it until a couple of weeks later. I checked on the progress, and lo-n-behold, the progress was slow. I had overwhelmed them. With too much to eat in too little time, combined with some of the types of scraps we put in (like fruit skins), fruit flies multiplied, en masse. December was a crazy month of holidays and travel, so I didn't look into it further. I just put out some fruit fly death soup (apple cider vinegar, sugar, water, and a little dish soap - it all tastes yummy until they lose their footing!), swatted them away when we used the finished part of the basement, and hoped that I hadn't ruined my wormies. We opted to stop feeding them for a while, until things got back to normal.

Had I read the website and booklet, I would have learned a simple trick for containing the fruit flies. I could have just filled our spare tray with shredded paper and used that as the top tray. The flies wouldn't be able to navigate through it to get out, and would prevent them from coming or going. Chrysanthemum spray would work too. Lessons learned! Don't overwhelm the tray, and fruit flies can be handled easily!

I checked on them again last month: the fruit flies were gone, the bottom tray had made a lot of progress, and the top tray was not looking like a dirty salad anymore. I noticed that some of our scraps, especially the eggshells, weren't really breaking down at all. Mostly it was the bigger pieces, as I was pretty inconsistent with that, so I think we'll definitely start chopping the bits into smaller pieces; apparently eggshells should also be dry and crumbled too, so something else we'll need to work on.

Overall, though, the worms pulled through just fine and are quite hardy. You don't have to slave over them, really. Leaving them alone for a few weeks, without even checking in, is not the end of the world.

So, now that we've gotten it established, worm care is pretty easy. Follow a few simple guidelines and a rotation schedule every 4-6 weeks, and the fresh compost will start rolling in...


So, what sorts of bedding do they need? Don't they die at some point? What happens once the compost is ready?


coming soon - 
part three: better living with worms


Much Love,
Able-Bodied Girl


Sunday, February 20, 2011

w/mo2h #4: composting with worms, part one

part one: welcoming your wormies

Before you ask: it's not smelly, you don't have to touch worms if you choose not to, and it does not require a lot of work. Just so's ya know...

Oh, the lady from the Costco ad
makes it look sooooo easy! Bah!
I hate throwing perfectly good food scraps away, and with a garden, it makes sense to to reuse this material for composting. But neither of us were willing to go through all the effort of building and maintaining an outdoor composting spot. So a couple of years ago we started with a small compost bucket in the kitchen, which every week was dumped into the brush at the edge of the yard. At least the weeds were getting fed, right?

Last year, Able-Bodied Boy and I struggled to make a large rotating composter work. We brought it home from Costco, put in some material and waited. We got ants. We waited. Everything else stayed the same. We made adjustments, added wet material or dead material. We finally determined that it was too dry because the bin was actually not really sealed properly. It still sits outside, looking like a small space capsule.

So I finally looked into vermi-composting: the worm method. There is a lot of information out there on the web, with a lot of different variations. I found the Journey to Forever website to be the most useful, from worm information to methods and techniques. I did look around, but this seemed to have concise information, consistent with most everything else I was reading.

One of our first considerations was location: we did not want stinky, buggy compost inside! Worms like consistent temperatures, and being out of the sun and rain, but they also don't produce odors or bugs readily. There were certain types of foodstuff that might induce a bad smell, or attract bugs, so I read that you just had to introduce those items slowly, if at all, to test how your batch reacted. So it seemed as if a basement location would actually work for us. Worst-case scenario: the stink could remain isolated to one corner of the basement, and if bugs became a huge problem we could take it outside while we regrouped and figured out what we did wrong.

Now, we were not keen to build our own box, so we opted for the Worm Factory. It's a tray system that allows you to have several different "stages" going at once, and a drain for excess water. Our main shopping venue is Amazon, and it's super-saver shipping, so we worked with those parameters in our search. There are plenty of other models out there similar to each other, and I have no doubt that each of them has pros, cons, and things you just plain adjust to. With some good reviews and features, we opted for the Worm Factory, bought a pound of worms, and waited for delivery.
The Worm Factory. We likie!

Providing us with complete instructions on how to care for the worms, and the bedding for the first batch, made setup very easy. The bedding they provided was a coir brick and some shredded paper; just soak the coir, then mix in paper. Our worms came in a small canvas bag, so they were easily dumped in. They recommend putting sheets of paper in the bottom of the lower tray (to keep the worms from dropping through to the base) and on top of the lid (to keep them in and keep the lid from getting too gross), and the box it came in was fulled with long sheets of paper padding, so we didn't even have to get any newspaper. Super simple! It even has a summary of instructions on the lid for convenience.

So everything went perfectly well for the first two months, despite one episode of worm suicide. Then Thanksgiving came and the worms revolted...  


What will happen next to our fair wormie friends? Why did some commit suicide? What was sacrificed in the Thanksgiving Day Massacre?


coming soon - 
part two: the great worm suicide, the thanksgiving day massacre, and other issues
part three: better living with worms


Much Love,
Able-Bodied Girl


Saturday, February 19, 2011

i wanna be a farmer!

Do you have one of those completely unrealistic visions for yourself? A dream beyond dreams that seems so easy and yet completely unattainable?

I want to be a farmer. Up to my elbows in manure, sweating in the garden, birthing goats, worrying about the weather, raising chickens, cutting wood in the winter, making due. Oh it's all so romantic in my mind.

I read about it. Daily. A myriad of bloggers. I regularly read gardening and farming and homesteading books. I research composting and starting seeds and naturally taking care of pests and plant diseases and how-tos for everything under the farmers sun and moon. And all I've concluded is that I need some hands-on instruction. Live-in instruction, really, over the course of many many seasons. And a lot more time.

I think I could have lived very happily as a farmer's wife, birthing babies and feeding goats and slaughtering the lambs. Ha! Not at all realistic, but that's what dreams are for, eh?

I was very amused with Sharon Astyk's blog post the other day on Casaubon's Book, where she described "realistic farm tours". I was all ready to take her seriously, and she only amused me with her irony and sarcasm. And made me fall in love with the idea even more. *sigh* But I want to take these classes!!
"Pick a buttload of little tiny things." You've always dreamed of being a farmer, right. Now you can enjoy the real experience - picking a whole lot of little annoying things for 9 hours in the sun. No matter what the season from early spring (dandelion blossoms for wine) to late spring (chamomile blossoms) to high summer (currants) to late summer (beans) to autumn (every last damned cherry tomato), there is always something small that needs to be picked, and picked some more. Learn new curse words to describe the idiot who planted these things and thought it would be a great idea to sell them! Bonus activity - wash an endless number of eggs that birds pooped on!
I think it might be the learning experience, the sum of so many intricate parts that all fit together to make that sort of life work, as it has for thousands of year. The rotation of crops and of the animals in the fields and the manure into compost. Sharon, in her other blog The Chatelaine's Keys, reposted something she had written before about the diversity and interconnectedness of the animals on her farm. It intrigues me, not only that everything can be so tied together to those animal's habits, but also that there is such a body of knowledge that I have no concept of. I just amazes me.

I do have a friend, Barnhenge Momma, who lives about as close to my dream as I think I could ever acheive. I'm hoping one of these days she'll grace us with a post about her homesteading life. All the canning and pickling and growing and life at her home makes my soul come alive, and gives her this wonderful mother-earth glow.

Maybe one day, slowly but surely, I'll find a happy medium between my black thumb of plant death and the vibrancy of a life surrounded by life. But the progress is so slow, if at all, that I think this might just have to stay in the 'dream' category.


What are your dreams? Do you have any hope of achieving them?


Much Love,
Able-Bodied Girl